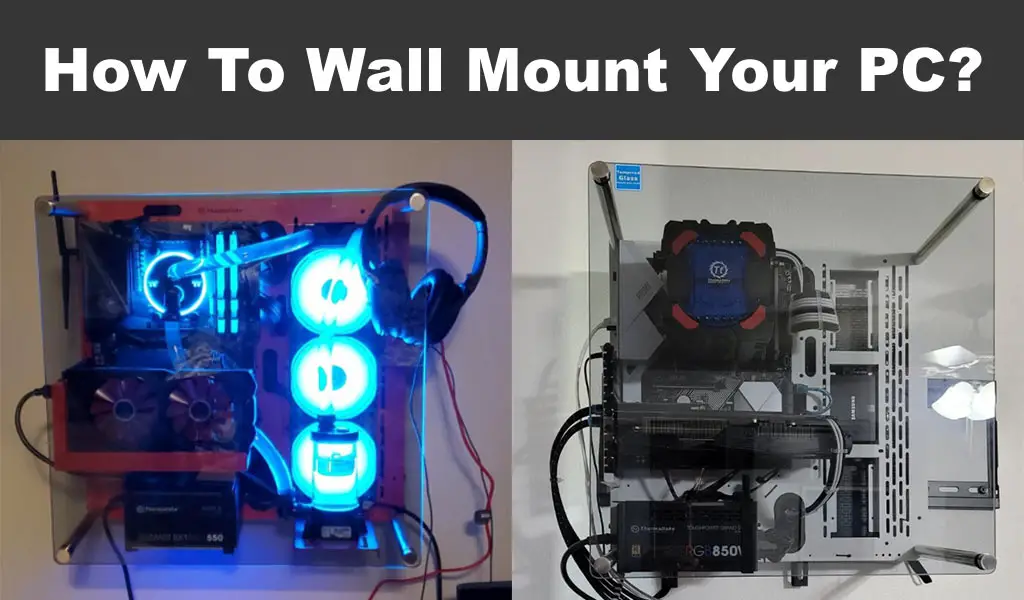
Mounting your PC onto the wall has several advantages. You get more space on your desk, the computer gets better airflow with less dust, and, most importantly, it looks pretty amazing. So, how to wall mount your PC?
Mounting a wall-mountable PC case is easy. You just need to follow the instructions and drill holes into the wall. Make sure to use the right drill bit size and to mark the points with a pencil. Use a level to ensure that everything is level. It is very similar to mounting a TV on the wall, especially if your case uses a standard VESA mount.
So, what are the steps that you need to take? And what equipment will you need? You can learn how to wall mount your PC by reading the whole article.
How to Wall Mount Your PC
Let’s start off by explaining the equipment you will need. Mounting a PC on the wall is very similar to mounting a TV on the wall. If you have already done that at some point, you will know how to do it as the same precautions and steps apply here.
Here’s everything that you need to wall mount your PC:
An important thing to point out here is that mounting a wall-mountable PC case is much easier than using wall-mounting hardware. Wall-mountable cases typically use the standard VESA mount layout. Depending on the case you get, you will probably need to buy a TV VESA mount with brackets to make it work. If you haven’t bought a case yet, it’s best to go with a wall-mountable one.
But if you want to mount a case that is not typically mountable, use third-party wall-mounting hardware to do it. The process may be a bit harder depending on the kit you get. Make sure to follow the instructions provided by the manufacturer carefully.
Whichever path you decided to take, here is how to wall mount your PC:
- Choose where to mount the case. You want to find a spot that does not have any outlets below or above as those have cables that you might drill a hole into, which can be extremely dangerous.
- Use a stud finder to locate the wooden studs behind the wall. Take your mounting plate and use your pencil to mark where the holes should be.
- Mount the bracket on the wall. Use the same drill bit size as the screws you have. If the manufacturer didn’t provide a recommended drill bit size, try your best to match the screw and the drill bit diameter. Use a level to make sure that your mounting bracket is parallel to the ground. Line up your mounting bracket with the pencil marks and start drilling. Be very careful when drilling and make sure everything is level.
- If the mounting hardware has a part that goes on the PC, mount it. You will only need to screw it into the standard VESA mounts, which is very easy. If you have a case that is not wall-mountable and are using a strap system, you don’t need to do this.
- Mount the PC. Now that your bracket is sitting securely on the wall and the other mounting part is on your PC, you just have to slide the case onto the bracket. Be careful and have someone help you to do this because dropping the PC could have devastating results. Make sure that the case sits comfortably in the middle of the bracket and does not slide around. If you are using straps, simply put the PC into the mounting bracket and secure the straps in place.
And that is all you have to do. Your PC is now sitting on the wall and your desk has more space than ever before. Plus, your system looks very cool and unique now.
Conclusion
Wall mounting a case that has standard VESA mount support is easy. You just need a TV bracket that can support the weight of your system and it will be done in a few steps. If you have universal straps, then you just use them to secure your case in place. Just be careful with the drill and don’t drop your PC when mounting it onto the wall.